
Small bedrooms are a real problem for most homeowners, every square inch counts, and wasted space under the bed feels like a missed opportunity. That’s where bed cubbies come in. These built-in storage units slide right under your mattress and give you a practical, attractive way to organize clothing, bedding, seasonal gear, or anything else that clutters your floor. Whether you’re dealing with a cramped guest room, a kid’s bedroom, or a tight master suite, a bed cubby maximizes the footprint you already have without eating up precious floor space. In this guide, we’ll walk you through what bed cubbies are, why they’re worth the effort, and how to design and install them yourself.
Table of Contents
ToggleKey Takeaways
- A bed cubby is a shallow storage unit (8–12 inches tall) that slides under your bed frame, offering organized compartments that protect contents better than traditional under-bed storage bags.
- Installing bed cubbies frees up valuable bedroom floor space without requiring expensive furniture or wall modifications, making them ideal for small bedrooms and renters.
- Proper planning and measurement—checking clearance, accounting for bed frame obstacles, and choosing the right height and material—are critical to a successful DIY bed cubby project.
- Build your bed cubby from 3/4-inch plywood with reinforcing cleats every 24 inches to prevent sagging, and use felt pads or locking casters for smooth installation and accessibility.
- Customize your cubby with dividers, labeled baskets, and a rotation system for seasonal items to maximize storage efficiency and keep everything organized and accessible.
- A well-built bed cubby is durable, customizable, and one of the highest-return DIY projects for small bedrooms, transforming dead space into a practical, intentional storage solution.
What Is a Bed Cubby and Why It’s a Game-Changer
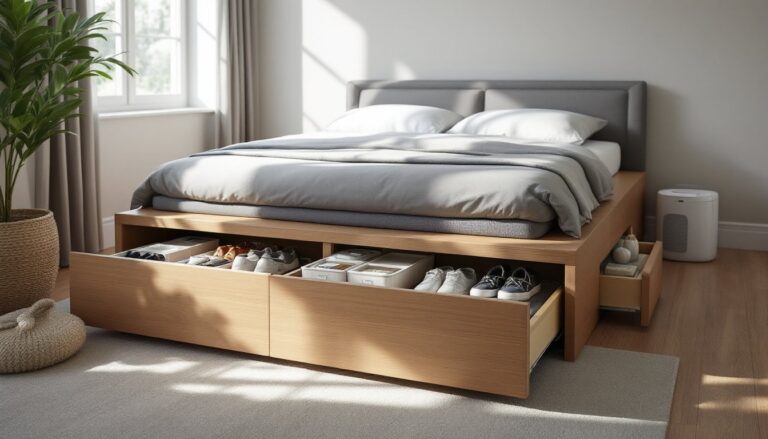
A bed cubby is a shallow storage box or drawer unit that sits directly under your bed frame, typically between 8 and 12 inches tall. Unlike traditional under-bed storage bags that trap moisture and flatten contents, cubbies are built from solid wood or plywood and offer organized compartments. Some are fixed in place: others roll on casters for easy access.
What makes them a game-changer is simplicity and efficiency. You’re not buying expensive bedroom furniture or breaking open walls. You’re using existing space that was already there, just sitting empty. Compared to under bed storage bins or basic sliding containers, a built-in bed cubby feels seamless, protects contents better, and looks intentional rather than improvised. They work especially well with bed frames that have adequate clearance and with bedrooms where floor space is at a premium.
Benefits of Adding Bed Cubbies to Your Bedroom
The upside of installing bed cubbies goes beyond just having a place to stash things. First, you free up bedroom floor space, no more dressers pushed into corners or piles of storage boxes stacked awkwardly. Second, everything stays organized and accessible without bending down to search through dark under-bed zones. If you’re using a twin bed with under storage or a full-size captain’s bed that already has drawers, a cubby system complements that nicely and adds even more capacity.
Third, bed cubbies are customizable. You can divide them into smaller compartments, add labeled dividers, or leave them open depending on what you’re storing. They also protect contents from dust, pet hair, and moisture far better than exposed storage. Finally, they’re durable. A well-built cubby from quality plywood or solid wood lasts years and can even be repurposed or moved if you change bedrooms. For families managing multiple mattress sizes or renters who want temporary solutions, adjustable or modular cubbies offer flexibility without permanent damage to the rental.
Designing and Planning Your Bed Cubby Project
Before you pick up a drill, measure twice and plan once. This is where most DIY projects either succeed or stumble.
Assessing Your Space and Style Preferences
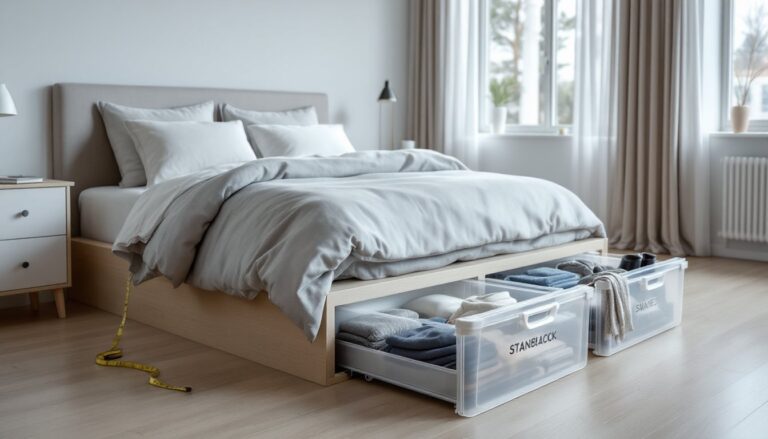
First, measure the clearance between the floor and the bottom of your bed frame. Standard bed frames sit 10 to 14 inches off the ground, which gives you a window for a cubby roughly 8 to 12 inches tall. Measure length and width carefully, cubbies should fit snugly, with no more than a 1/4-inch gap on each side. If your bed frame has a center support beam or adjustable legs, plan around those obstacles.
Next, consider material and style. A simple 3/4-inch plywood cubby painted white or stained natural fits most bedrooms and costs less than solid wood. For under bed storage bins that sit inside the cubby, plan compartment widths of 24 to 30 inches each, large enough to hold folded clothes or seasonal items, but not so wide that reaching the back becomes awkward. If you want wheels or casters on the cubby, choose locking ones and factor 1 to 2 inches into your height budget. Finally, decide whether you want open cubbies (easier to build, more modern feel) or ones with fronts and doors (cleaner look, more contained storage).
DIY Installation Steps for Built-In Bed Cubbies
A basic bed cubby is a plywood box. Here’s a simplified approach:
Materials:
• 3/4-inch plywood sheets (calculate linear feet based on length and width)
• 1×2 or 2×2 lumber for frame and support cleats
• Wood screws (1 1/4-inch and 2 1/2-inch)
• Wood glue (optional but recommended)
• Primer and paint or wood stain
• Felt pads or casters (if rolling)
• Dividers or interior shelving (optional)
Tools:
• Circular saw or miter saw
• Drill-driver
• Measuring tape
• Speed square
• Clamps
• Orbital sander (120- and 180-grit)
• Safety goggles, work gloves, dust mask
Steps:
-
Cut your plywood and frame pieces. Rip plywood to height (typically 8 to 10 inches) and length (the full span of your bed). Cut side panels, a bottom panel, and front/back panels. A miter saw gives cleaner angle cuts if you need to fit around bed legs, but a circular saw with a guide works fine for straight cuts.
-
Assemble the frame. Lay out your side panels and bottom panel on a flat surface. Apply wood glue to joints and screw them together with 1 1/4-inch screws (two per corner minimum). Use a speed square to check that corners are 90 degrees before tightening everything down.
-
Reinforce with cleats. Screw 2×2 lumber (called cleats) to the inside of the bottom panel every 24 inches to prevent sagging under weight. This is critical if you’re storing heavy items like books or seasonal bedding.
-
Sand and finish. Use a 120-grit orbital sander to smooth all surfaces, then finish with 180-grit for a fine surface. Wipe away dust and apply primer, then paint or stain. Let cure fully, 24 hours minimum before sliding it under the bed.
-
Install casters or felt pads. If your cubby is tall enough (12 inches), screw casters into the underside of the frame. Otherwise, adhesive felt pads reduce friction and protect your flooring.
-
Slide into place and level. With a helper, slide the cubby under the bed. Check that it sits flat using a torpedo level. Adjust casters or shims (thin wooden wedges) as needed so the mattress doesn’t sag unevenly.
Safety Notes: Wear safety goggles when sawing or sanding. Dust from plywood can irritate lungs, so use a dust mask when sanding. If you’re using screws near where you’ll stand on the bed or near where children sleep, make sure no screw heads protrude above the frame. For load-bearing details or structural questions, consult the International Building Code (IRC) or a local contractor, cubbies are light-duty storage and don’t typically require permits, but local codes vary.
Styling and Organizing Your Bed Cubby Space
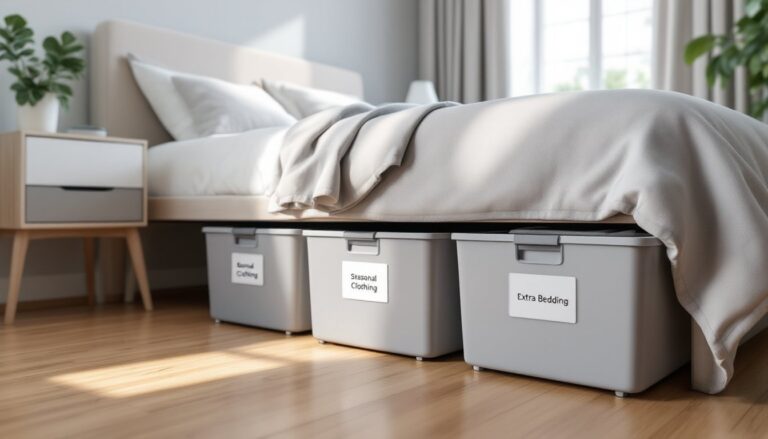
Once your cubby is installed and finished, the real payoff is organization. Use dividers (simple plywood scraps or adjustable plastic shelf pins) to create sections for different categories: off-season clothes in one compartment, bedding in another, luggage or sports gear in a third.
Labeled baskets or fabric bins inside the cubby keep items grouped and make grabbing what you need quick and easy. Clear plastic containers work if you like seeing what’s stored without opening each one. For families, a single storage bed with built-in drawers serves a similar purpose and can pair nicely with a supplemental cubby for overflow.
If you’re working with a full size captain’s bed, a cubby underneath adds another layer of capacity beyond the built-in drawers. For kids’ rooms, a twin bunk bed with storage can sit atop a cubby system for maximum vertical use.
Rotate seasonal items twice a year, winter coats go down in summer, summer clothes in winter, so you’re always using your space efficiently. Vacuum-seal bags compress bulky items like comforters, though they do flatten fabrics over time. Keep the area in front of the cubby clear so you can roll it out for cleaning or accessing the back. Your finished bed cubby should feel like a built-in feature, not an afterthought wedged under the bed. When it’s done right, it transforms how a small bedroom functions.
Conclusion
Bed cubbies are a practical, cost-effective solution for bedrooms that need more storage without more furniture. By measuring carefully, building solid, and finishing with intention, you can turn dead space under your bed into an organized asset. Whether you’re storing seasonal items, overflow clothes, or just reclaiming floor space, this project pays dividends every time you reach for something and find it exactly where you left it. If you’re working with tight square footage, this is one of the highest-return DIY projects you can tackle.