Bathrooms are shrinking, but the stuff we keep in them isn’t. Between towels, toiletries, cleaning supplies, and the mysterious accumulation of half-empty shampoo bottles, most bathrooms hit capacity fast. A well-chosen storage rack doesn’t just add shelf space, it reclaims vertical real estate, keeps surfaces clear, and can turn a cluttered half-bath into a functional zone. Whether working with a rental where wall-mounting isn’t an option or a master bath with blank walls begging for organization, the right rack makes the difference between chaos and control.
Table of Contents
ToggleKey Takeaways
- A bathroom storage rack maximizes vertical space without renovation, making it an ideal solution for small bathrooms and rental properties where wall-mounting options are limited.
- Over-the-toilet racks, corner racks, and ladder-style designs each serve different spaces; choose based on your bathroom layout, not aesthetics, and always measure available width, depth, and height first.
- Powder-coated steel and stainless steel storage racks resist moisture better than wood or particleboard, especially in humid environments prone to mildew and warping.
- Weight capacity per shelf, not just total unit capacity, is critical—a single shelf can easily hold 20+ pounds when stacked with towels and toiletries, so verify manufacturer ratings.
- Proper installation varies by mounting method: freestanding units need leveling and anti-tip measures, wall-mounted racks require stud support or heavy-duty anchors, and tension poles need correct tension to prevent sagging.
- Open shelves reduce mildew risk by allowing air circulation, while closed storage requires regular airing to prevent humidity buildup and should be avoided in naturally damp bathrooms.
Why Every Bathroom Needs a Storage Rack
Bathroom storage racks solve a problem that cabinetry and vanities can’t: they maximize unused vertical space without a renovation. Most bathrooms have at least one dead zone, above the toilet, in a corner, or along a narrow wall, that’s perfect for a freestanding or wall-mounted rack.
Vertical storage keeps countertops clear, which matters in small bathrooms where counter space doubles as prep area, grooming station, and temporary landing pad. A rack also provides designated zones for different items: towels up top, daily-use products at eye level, and backup supplies below. This kind of zoning reduces clutter and makes it easier to find what’s needed without digging through cabinets.
From a practical standpoint, racks are often the only storage solution renters can install without losing a deposit. Freestanding units require zero wall anchoring, and tension-mounted options leave no holes. Even in owned homes, adding a rack is faster and cheaper than installing built-in shelving or expanding cabinetry. For anyone dealing with a bathroom that wasn’t designed with enough storage, which is most of them, a rack is the quickest fix that doesn’t involve a contractor.
Types of Bathroom Storage Racks to Consider
Not all racks are built the same, and choosing the wrong style for the space leads to wasted money and frustration. Here’s a breakdown of the most common types and where they work best.
Over-the-Toilet Racks and Shelving Units
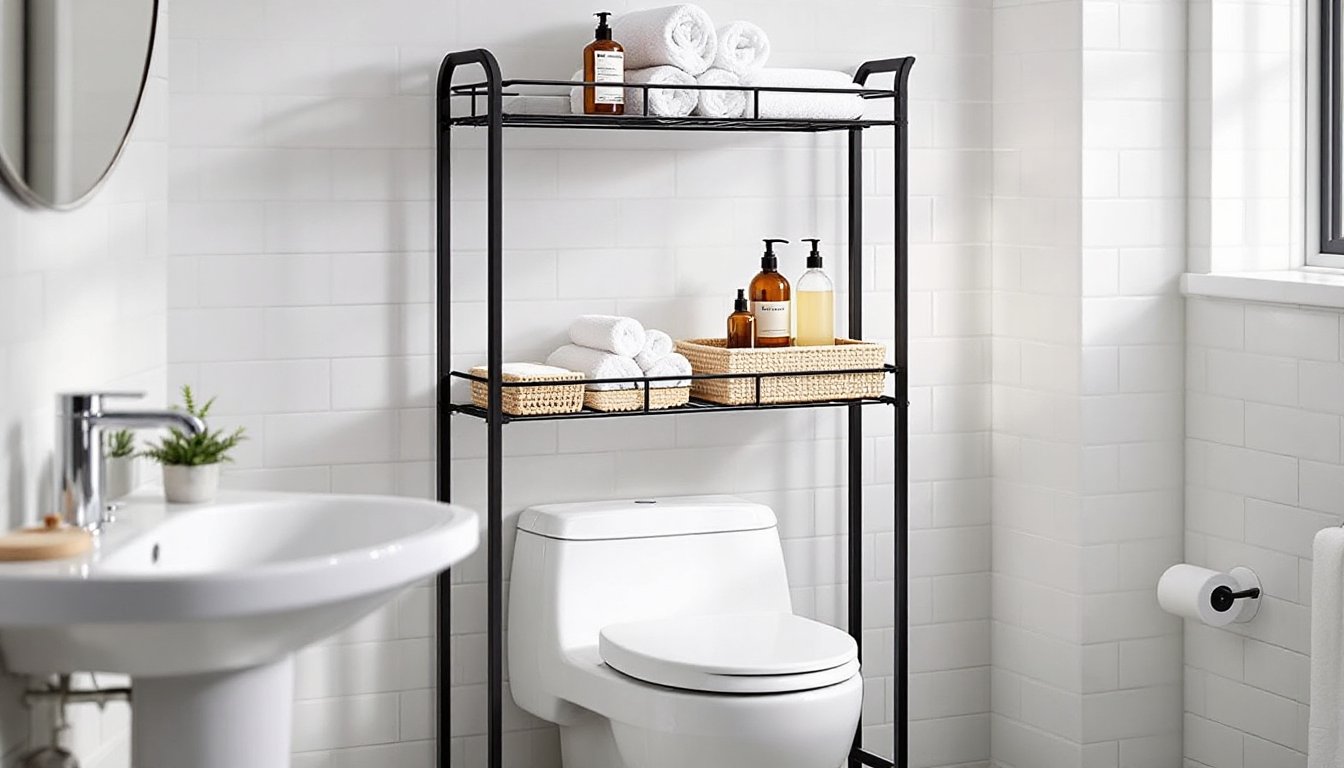
Over-the-toilet racks are the workhorses of bathroom storage. They fit into the narrow footprint above the tank, typically spanning 24 to 27 inches wide to clear standard toilet widths. Most units stand 60 to 68 inches tall and include two to three open shelves.
Freestanding models rest on the floor with legs that straddle the toilet. They’re stable, require no wall anchors, and work in rentals. Wall-mounted versions attach directly to studs or drywall anchors, freeing up floor space and creating a floating look. Wall-mounted styles are more secure and easier to clean underneath, but they require finding studs or using heavy-duty drywall anchors rated for at least 50 pounds per shelf when fully loaded.
Material matters here. Metal frames with powder-coated finishes resist moisture better than particleboard or MDF, which can swell and warp in humid bathrooms. Bamboo and solid wood options exist, but they need proper sealing and ventilation to avoid mold. Adjustable shelves add flexibility, especially if storing tall bottles or stacking folded towels. Incorporating ideas from tall storage cabinet builds can help maximize vertical space in compact bathrooms.
Corner Racks and Space-Saving Solutions
Corner racks exploit the 90-degree angles that standard furniture can’t. Triangular shelves fit snugly into corners, and tiered designs can climb from floor to ceiling. These work especially well in bathrooms with pedestal sinks or wall-hung vanities, where there’s no under-sink storage.
Tension-pole corner racks use spring-loaded rods that wedge between floor and ceiling, requiring no screws. They’re renter-friendly and quick to install, but they need solid contact points top and bottom. If the ceiling is drywall over a truss rather than a solid joist, the pole can lose tension over time and sag. Check the weight rating, most tension poles max out around 20 to 30 pounds total, so they’re better for lightweight items like washcloths and plastic bottles than heavy glass jars or cast-iron decor.
Ladder-style racks lean against the wall at an angle, offering three to five rungs with progressively wider shelves toward the base. They don’t require mounting, but they do need wall contact to stay stable. Place them on non-slip pads or anchor the top rung with a small L-bracket if kids or pets are in the house.
For truly tight spaces, slim rolling carts (typically 6 to 10 inches wide) slide into the gap between the vanity and toilet or next to the tub. They’re mobile, so they can be pulled out for access and tucked away when not needed. Look for models with locking casters to prevent accidental rolling.
How to Choose the Right Storage Rack for Your Bathroom
Start with measurements, not aesthetics. Measure the available width, depth, and ceiling height, then subtract two inches from each dimension to account for baseboards, trim, and door swing clearance. A rack that fits on paper but blocks the door isn’t functional.
Weight capacity is critical and often underestimated. A stack of bath towels weighs 10 to 15 pounds. Add in toiletries, and a single shelf can easily hit 20 pounds. Check the manufacturer’s rating per shelf, not just the total unit capacity. If the spec sheet doesn’t list it, skip that product, it’s a red flag for flimsy construction.
Material choice depends on bathroom conditions. Powder-coated steel or aluminum racks handle moisture well and won’t rust if the coating stays intact. Stainless steel is more expensive but virtually indestructible in wet environments. Wood and bamboo look warmer but need adequate ventilation and a water-resistant finish. Avoid unfinished MDF or particleboard unless the bathroom has excellent ventilation and stays dry, these materials swell and fall apart with repeated moisture exposure.
Open vs. closed storage affects both function and cleaning. Open shelves are easier to access and let air circulate, which reduces mildew. Closed cabinets or racks with doors hide clutter but trap humidity, so they need regular airing out. If choosing a unit with fabric bins or woven baskets, make sure they’re removable and washable.
Consider the mounting method relative to wall type. Drywall requires toggle bolts or molly bolts rated for the total weight. Plaster walls need special anchors that won’t crack the finish. Tile walls are trickier, drilling through tile requires a carbide or diamond bit and careful technique to avoid cracking. If uncomfortable drilling tile, stick with freestanding or tension-mounted options.
For design inspiration and understanding how storage solutions integrate with overall home organization strategies, exploring different interior design approaches can provide helpful context for both style and function.
Installation Tips for Different Rack Styles
Freestanding racks are the easiest install, most just require assembly with an Allen wrench or screwdriver. Set the unit in place, level it with shims if the floor is uneven, and load heavier items on lower shelves to prevent tipping. If the rack feels unstable, add adhesive furniture pads underneath the legs or use a furniture strap to anchor the top to the wall. This is especially important in homes with kids or in earthquake-prone areas.
Wall-mounted racks need stud support for maximum load capacity. Use a stud finder to locate the framing behind the drywall. Standard stud spacing is 16 inches on center, but older homes may have 24-inch spacing. If the rack’s mounting holes don’t align with studs, use heavy-duty toggle bolts (rated for 50+ pounds each in 1/2-inch drywall) or a mounting board approach: screw a 1×4 or 1×6 board horizontally into two studs, then mount the rack to the board. This distributes weight and allows flexible positioning.
When drilling into tile, mark the hole location with painter’s tape to prevent the bit from skating. Start with a small pilot hole (1/8-inch carbide bit) at slow speed, then step up to the final diameter. Keep the drill perpendicular to the wall and use light pressure, let the bit do the work. Forcing it can crack the tile. Insert plastic anchors or lead shields into the holes, then drive the mounting screws.
Tension-pole racks install quickly but need a few tricks for stability. Extend the pole until it’s about an inch shorter than the ceiling height, position it, then twist the adjustment mechanism to apply pressure. The pole should feel firm, if it compresses more than 1/4 inch when pressed, it’s over-tensioned and may damage drywall or pop through a drop ceiling. If it wiggles, it’s under-tensioned and will sag under load. Check tension monthly, especially in the first few weeks as the mechanism settles.
Safety note: Always wear safety glasses when drilling overhead, and use a dust mask if drilling into plaster or tile. Inspect wall anchors annually, if screws feel loose or the rack wobbles, remove it, upgrade to larger anchors, and reinstall. A loaded rack that falls can cause serious injury and damage plumbing fixtures.
Conclusion
A bathroom storage rack is one of the simplest upgrades that delivers immediate, measurable improvement. The right unit clears counters, organizes essentials, and makes the most of vertical space without the cost or hassle of a renovation. Focus on solid construction, proper installation, and realistic weight limits, and the rack will serve well for years.