Free standing kitchen storage cabinets offer a practical solution for homeowners dealing with cramped kitchens, awkward layouts, or the need for extra storage without the commitment and cost of a full remodel. Unlike permanent built-ins, these movable units deliver flexibility, shift them when you rearrange, take them when you move, and skip the permit headaches. Whether you’re working with a rental, a dated kitchen, or simply need more pantry space without tearing out walls, free standing cabinets bridge the gap between temporary fixes and major renovation projects.
Table of Contents
ToggleKey Takeaways
- Free standing kitchen storage cabinets provide flexibility and cost savings without the $150–$500 per linear foot expense and commitment of custom built-in cabinetry, making them ideal for renters and homeowners avoiding major renovations.
- Pantry, base, and utility cabinets each serve specific functions; pantry units solve dry goods sprawl with adjustable shelves, while base cabinets create additional prep space and utility models fill corner dead zones.
- Quality construction—dovetail joinery, full-extension ball-bearing drawer slides, and shelves thicker than 5/8 inch—ensures cabinets last years rather than months and handle the weight of small appliances or canned goods without sagging.
- Strategic placement beside refrigerators, in corners, or as room dividers maximizes small kitchen space, while dual-purpose mobile units on locking casters transform base cabinets into functional prep islands or coffee stations.
- Solid wood and cabinet-grade plywood offer durability and repairability superior to MDF and particleboard, with hard enamel or polyurethane finishes protecting against moisture and chips in kitchen environments.
Why Choose Free Standing Kitchen Storage Cabinets Over Built-Ins?
Free standing cabinets sidestep the commitment and cost of custom cabinetry. Built-ins require demolition, professional installation, and often electrical or plumbing reroutes. Expect to budget $150–$500 per linear foot for custom work, plus permits if you’re altering load-bearing walls or adding outlets. Free standing units, by contrast, arrive ready to use, no contractor, no drywall repair, no waiting weeks for delivery.
Flexibility is the bigger win. Renters can’t modify walls, but they can roll in a pantry cabinet and reclaim it when the lease ends. Homeowners testing a new layout appreciate the ability to move a base cabinet from one wall to another without patching holes or repainting. This adaptability matters in homes where needs shift, a young family today might want toy storage, then pivot to a coffee station or wine rack in five years.
Free standing cabinets also integrate with existing kitchens without requiring matching finishes or custom dimensions. A built-in demands continuity with current cabinetry, limiting color and style choices. A standalone piece can contrast or coordinate as desired, making it easier to blend vintage finds, modern utility pieces, or budget options.
One trade-off: free standing units don’t maximize every inch of vertical or corner space the way built-ins can. They leave gaps behind and beside them, and they can’t be anchored flush to walls in earthquake-prone zones without drilling. Still, for most DIYers, the speed and cost savings outweigh those limitations.
Types of Free Standing Kitchen Storage Cabinets
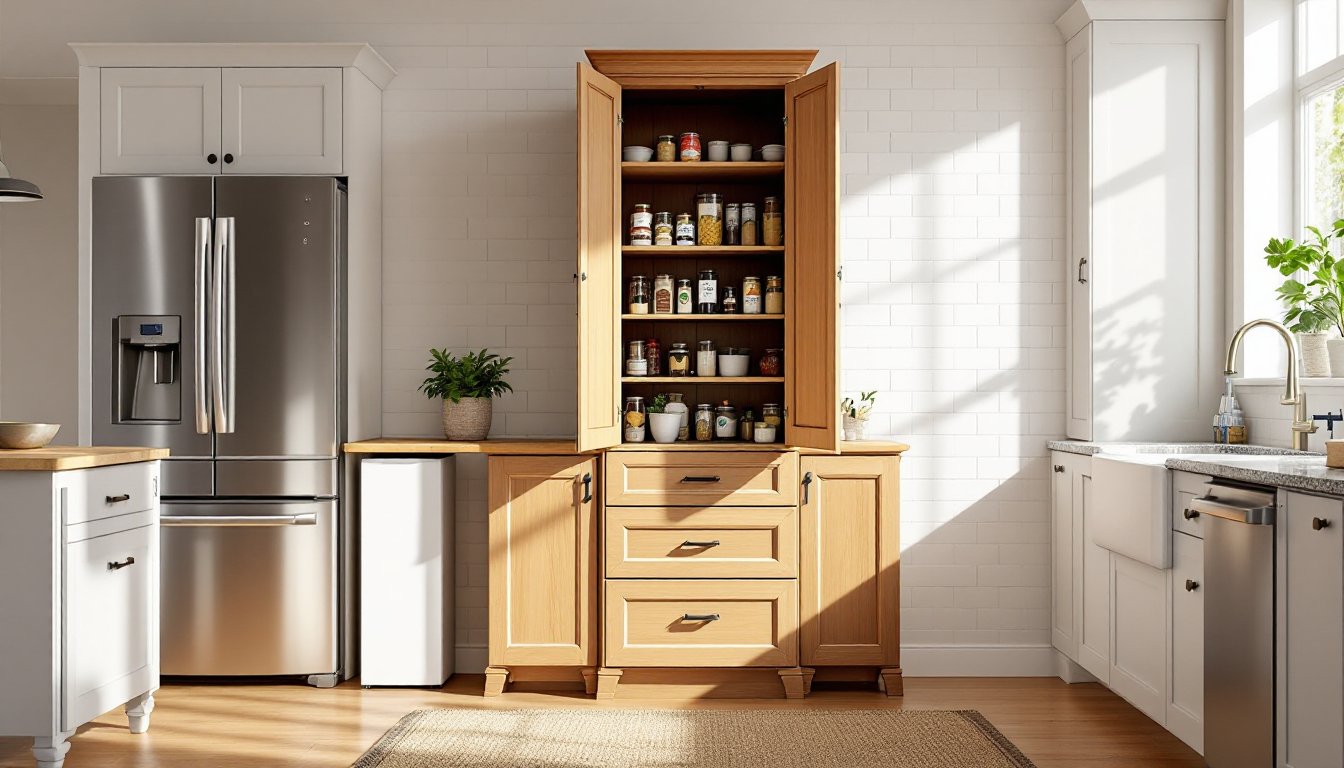
Pantry Cabinets
Tall pantry cabinets, typically 72 to 84 inches high, solve the perennial problem of dry goods sprawl. Look for units with adjustable shelves, standard spacing is 12 inches, but canned goods need 10 inches and cereal boxes closer to 14. Full-height units often include a mix of open shelving, pull-out drawers, and cabinet doors to separate spices, bulk items, and cleaning supplies.
Many pantry cabinets feature pull-out trays or lazy Susans, which beat fixed shelves for access to back corners. If you’re buying unfinished, note that solid wood units weigh 80–120 pounds empty: anchor them to the wall with L-brackets and toggle bolts rated for the cabinet’s loaded weight. Building codes don’t mandate anchoring free standing furniture, but it’s smart practice, especially in homes with kids or pets.
For DIYers comfortable with a saw and drill, building a custom pantry cabinet from plans lets you tailor dimensions to odd spaces and finish to match existing trim. Expect to spend $150–$300 on materials, 3/4-inch plywood for the carcase, 1×2 pine for face frames, and edge banding for exposed edges.
Base and Utility Cabinets
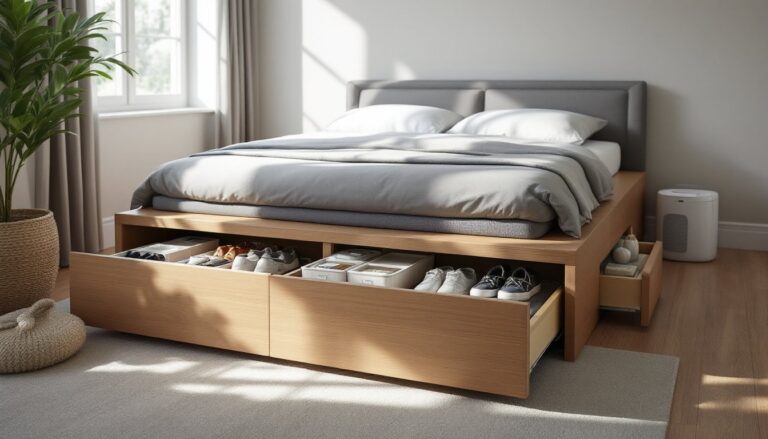
Base cabinets stand 34.5 inches tall (matching standard counter height) and range from 12 to 48 inches wide. They’re ideal for creating an island substitute, adding counter prep space, or housing small appliances. Look for models with solid wood or plywood construction rather than particleboard: the former handles moisture and weight without sagging.
Utility cabinets split the difference, 60 to 72 inches tall, narrower than pantries, with a mix of shelves and drawers. They work well in corners or beside refrigerators, filling dead zones that built-ins would leave empty. Some include broom closets with vertical slots for mops and dustpans, a detail often missing in standard cabinet runs.
Base units with butcher block or stainless steel tops double as additional prep surfaces in small kitchens. If adding a cabinet with a countertop, confirm the top is secured with brackets or screws, not just resting loose, shifting tops are a safety hazard when moving hot pots.
How to Choose the Right Free Standing Cabinet for Your Kitchen
Start with accurate measurements of the available floor space, accounting for door swing and drawer pull clearance. A 24-inch-deep cabinet needs at least 30 inches of floor depth when the door opens 90 degrees. Measure ceiling height too, many pantry cabinets are 84 inches tall, which won’t fit under 8-foot ceilings with baseboard and crown molding eating the margins.
Construction quality separates a five-year piece from a five-month one. Check for dovetail or mortise-and-tenon joinery in drawers, not stapled butt joints. Drawer slides should be full-extension, ball-bearing models rated for 75–100 pounds. Shelves thicker than 5/8 inch resist sagging under canned goods: anything thinner needs a center support.
Finish matters for durability. Painted cabinets need a hard enamel topcoat, not latex wall paint, to resist chips and moisture. Stained wood should have a polyurethane or lacquer finish, especially near sinks or dishwashers. Unfinished units save money but require sealing with primer and paint or stain and poly before use, budget a weekend for that work.
Consider depth carefully. Standard base cabinets run 24 inches deep, matching built-ins, but shallower 12- or 18-inch units prevent a bulky footprint in narrow galley kitchens. Pantry cabinets are often 18 inches deep, which fits most dry goods without projecting too far from the wall.
Weight capacity is listed on most commercial units, ignore it at your peril. A 150-pound rating means the unit, not each shelf. Overload shelves with small appliances or cast iron, and you’ll get sagging or collapse. If storing heavy items, choose cabinets with plywood sides rather than particleboard, which compresses under load.
Creative Placement Ideas to Maximize Kitchen Space
Dead zones beside the fridge or stove are prime real estate for narrow pantry cabinets. A 12- or 15-inch-wide pull-out pantry fits here, creating vertical storage where wall cabinets would hang too low. Measure the gap carefully, many refrigerators project 30–36 inches from the wall, so a cabinet beside it shouldn’t exceed that depth unless you want it sticking out.
In open-plan homes, a tall free standing cabinet can act as a room divider, separating the kitchen from the dining or living area without blocking sightlines entirely. Position it perpendicular to the wall, and you create a natural endpoint for the kitchen zone. This works especially well with open-back units that display glassware or cookbooks on one side.
Corner placement saves floor space but demands attention to door swing. A right-hinged door needs clearance to the left: if the adjacent wall is too close, the door won’t open fully. Test this by taping cardboard to the floor in the cabinet’s footprint and swinging the door through its arc.
Small kitchens benefit from dual-purpose cabinets. A base unit topped with butcher block becomes a mobile island: add locking casters rated for 100 pounds per wheel, and it rolls out for prep work, then tucks against the wall. Some homeowners turn base cabinets into coffee stations, housing a maker, mugs, and beans in one contained footprint.
Narrow spaces between appliances or at hallway entrances accommodate slimline storage solutions that hold spices, cutting boards, or baking sheets. These units, often 6 to 10 inches wide, slide into gaps where standard cabinets won’t fit. They’re particularly useful in older homes with irregular layouts.
Materials, Styles, and Finishes That Match Your Décor
Solid wood, maple, oak, or pine, offers durability and repairability. Dents sand out, scratches touch up, and the material handles humidity better than composites. Expect to pay $300–$800 for a quality solid wood pantry cabinet. Pine costs less but dents more easily: maple and oak resist wear but command higher prices.
Plywood with veneer strikes a middle ground. The core resists warping, and thin hardwood veneer provides a finished look. Quality matters here, cabinet-grade plywood (13-ply or higher) won’t delaminate like cheap 5-ply. Edges should be banded or trimmed to hide the ply layers.
MDF and particleboard dominate budget cabinets. MDF takes paint well and resists warping, but it’s heavy and soaks up water like a sponge, keep it away from sinks and dishwashers. Particleboard is lighter and cheaper but crumbles if fasteners pull out or moisture intrudes. Neither material repairs well once damaged.
Finish choices span traditional to contemporary. Shaker-style doors with inset panels suit farmhouse and transitional kitchens. Flat-panel (slab) doors lean modern and clean-line. Glass-front cabinets display dishes but demand tidy interiors, no one wants to showcase mismatched Tupperware.
Color trends shift, but neutral whites, grays, and natural wood tones integrate with most décor schemes. Bold colors (navy, green, black) make statements but limit future flexibility. If painting an unfinished unit, use oil-based primer followed by acrylic enamel for a hard, washable finish. Sand between coats with 220-grit paper for a smooth result.
Hardware upgrades transform builder-grade cabinets. Swapping plastic knobs for brushed nickel or matte black pulls costs $2–$8 per piece but elevates the overall look. Match finishes to existing kitchen hardware, mixing metals works only if intentional, not accidental.
For those managing broader kitchen organization strategies, choosing cabinets that complement existing storage systems creates visual cohesion. Free standing pieces should enhance, not clash with, the room’s existing layout and flow, particularly in homes where every square foot counts.