Nothing kills a kitchen‘s workflow faster than a countertop crowded with appliances. That bread maker you used twice, the stand mixer collecting flour dust, the air fryer blocking your prep space, they’re all stealing square footage you need for actual cooking. Smart appliance storage isn’t about hiding everything: it’s about creating a system where daily-use tools stay accessible while occasional gadgets disappear until needed. Whether you’re working with a galley kitchen or a spacious cook’s zone, the right storage approach transforms chaos into a workspace that actually works.
Table of Contents
ToggleKey Takeaways
- Kitchen appliance storage prevents counter clutter, protects your workspace, and extends appliance life by protecting devices from grease, water damage, and unnecessary wear.
- Sort appliances by frequency of use: daily tools stay accessible on counters or lower cabinets, weekly items belong at waist height, and occasional-use gadgets should be stored in upper cabinets or off-site locations.
- Pull-out shelves, lazy Susans, and appliance garages maximize cabinet efficiency while keeping frequently used appliances plugged in and ready to use.
- Wall-mounted storage, rolling carts, and flip-up shelves offer flexible kitchen appliance storage solutions that work in small or rental spaces where permanent modifications aren’t possible.
- Eliminate redundant appliances first—ruthlessly audit whether you truly need duplicate gadgets, as eliminating clutter creates more space than any storage system can provide.
- Store items used together in the same zone and measure appliances before planning storage to ensure they fit your cabinet openings and available space.
Why Kitchen Appliance Storage Matters for Function and Style
Counter clutter isn’t just an eyesore, it’s a functional problem. Every blender and coffee maker sitting out takes up workspace needed for meal prep, reducing efficiency and making clean-up harder. Appliances also collect grease, dust, and food splatter when left exposed, which means more cleaning and potential hygiene issues.
From a design perspective, visible appliances can make even a renovated kitchen feel cluttered and unfinished. Real estate agents know that staged kitchens with clear counters photograph better and help homes sell faster. But this isn’t about achieving showroom perfection, it’s about creating a space where you can find what you need without moving three other things first.
Proper storage also extends appliance life. Devices left out near stovetops get coated in cooking grease: those near sinks risk water damage. Tucking them away when not in use protects motors, screens, and finishes from unnecessary wear. The goal is to store items based on frequency: daily drivers stay accessible, while weekly or monthly tools get deeper storage.
Assessing Your Appliances: What to Keep Out vs. Store Away
Start by pulling everything off your counters and sorting by actual use, not aspirational habits. Be honest, if you haven’t spiralized a vegetable in six months, that spiralizer doesn’t deserve counter space.
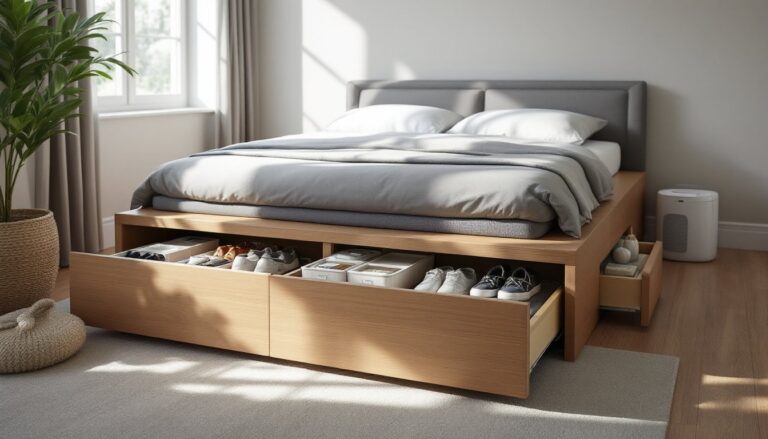
Daily-use appliances (coffee maker, toaster, electric kettle) should stay accessible, either out on counters or in easy-reach locations like lower cabinets with pull-out shelves or appliance garages. These get used enough to justify the convenience.
Weekly appliances (blender, food processor, hand mixer) can live in base cabinets or pantry shelves at waist height. They’re heavy enough that reaching overhead gets old fast, so keep them between knee and shoulder level if possible.
Occasional-use items (waffle iron, slow cooker, bread machine) belong in upper cabinets, basement storage, or pantry top shelves. If you only pull it out for holidays or special recipes, it doesn’t need prime real estate.
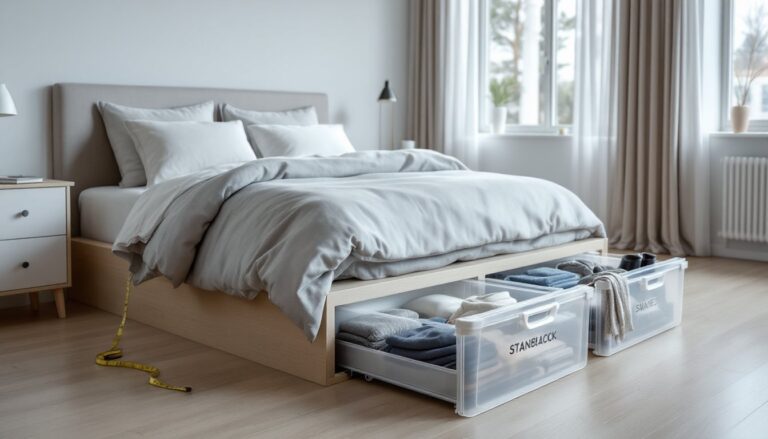
Measure your appliances before planning storage. A 14-inch tall stand mixer won’t fit in a standard 12-inch cabinet opening. Note plug locations too, some appliances work better stored plugged in and ready to use, which limits placement options.
Cabinet and Drawer Storage Solutions
Base cabinets offer the best weight capacity for heavy appliances, but standard shelves waste vertical space. Add pull-out shelves or roll-out trays rated for 100+ pounds to make accessing that stand mixer or food processor easier. These are available as retrofit kits or can be built from 3/4-inch plywood with full-extension drawer slides.
For corner cabinets, lazy Susans work well for smaller items like immersion blenders, hand mixers, and attachments. The rotating access prevents items from getting lost in the back. Blind-corner pull-out systems cost more but maximize otherwise wasted space in L-shaped cabinet runs.
Deep drawers with pegboard or adjustable dividers keep smaller appliances organized and prevent them from sliding around. Line drawers with non-slip shelf liner to protect finishes.
Appliance Garages and Hidden Compartments
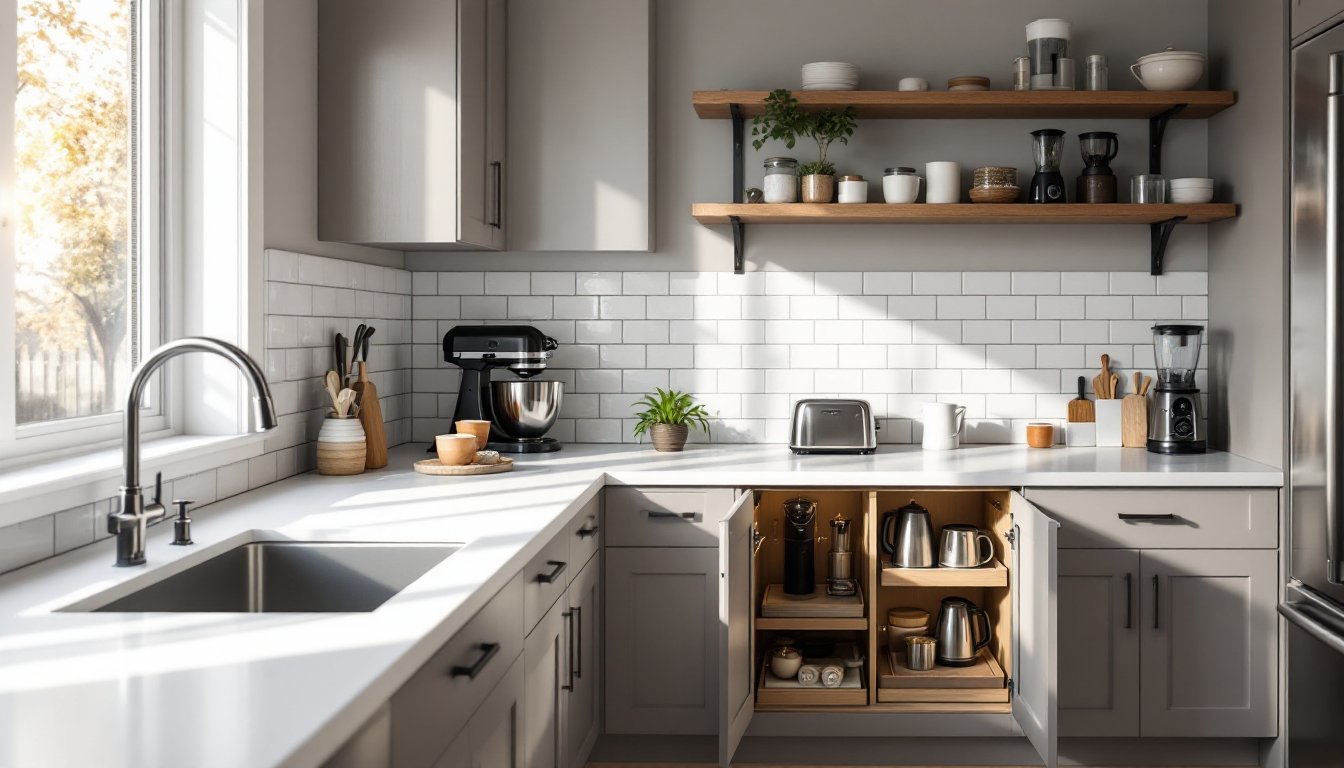
An appliance garage is a dedicated cabinet section with a roll-up, flip-up, or sliding door that hides countertop appliances while keeping them plugged in and ready to use. These typically occupy a corner or end section of upper cabinets and need an electrical outlet installed inside.
Building one requires basic carpentry skills. Frame an opening in your upper cabinets, install an outlet (hire a licensed electrician if you’re not comfortable working with 120V wiring per NEC guidelines), and add a tambour door (roll-up style) or hinged panel. Standard tambour kits come in 18-inch, 24-inch, and 30-inch widths.
For a simpler version, remove the door from an existing corner cabinet, add an interior outlet, and install a pull-down door or curtain. This works especially well in compact kitchen layouts where counter space is limited.
Pocket doors or bi-fold cabinet doors also create hidden storage zones without the hardware complexity of tambour systems. Mount them on soft-close hinges to prevent slamming, which can damage both the door and appliances inside.
Vertical and Wall-Mounted Storage Options
Wall space is underutilized in most kitchens. Floating shelves made from 1.5-inch thick hardwood or plywood can support smaller appliances like toasters or blenders, but they need proper anchoring. Use toggle bolts or locate wall studs and secure with 3-inch screws through shelf brackets rated for the weight.
For frequently used items, open shelving beats closed cabinets for accessibility. But know that everything will collect cooking grease and need regular cleaning. Keep shelf depth to 10-12 inches to prevent items from getting lost in back.
Wall-mounted racks with hooks work for hanging items like hand mixers, immersion blenders, and electric can openers. Mount to studs or use heavy-duty anchors rated for at least 50 pounds per hook. Mount at a height where you can lift items on and off without straining, typically 48-60 inches from the floor.
Pegboard walls provide flexible storage for smaller appliances and attachments. Use 1/4-inch hardboard pegboard mounted with 1-inch spacers behind it to allow hook insertion. Paint it to match your kitchen or leave it natural. Metal pegboard systems offer more durability but cost three to four times as much.
Avoid mounting heavy appliances above head height. A falling food processor is a safety hazard and can damage countertops below.
Creative DIY Kitchen Appliance Storage Ideas
Rolling carts solve storage problems in rentals or kitchens where permanent modifications aren’t an option. Choose carts with locking wheels and a top surface that can handle weight, look for butcher block or stainless steel tops rather than thin laminate. Park the cart in a pantry or corner when not in use, roll it out for meal prep.
Build a custom appliance shelf that slides out from a base cabinet. Cut a piece of 3/4-inch plywood to cabinet dimensions minus 1 inch for clearance, attach full-extension slides rated for the weight, and add a recessed pull or handle. This turns a static shelf into an accessible workspace that hides away when done.
For tight spaces, consider a flip-up shelf that mounts inside a cabinet door. These work for lighter appliances like hand mixers or electric kettles. Use heavy-duty lid-stay hinges that hold the shelf horizontal when open and fold flat when closed.
Repurpose a skinny storage cabinet beside the refrigerator as a dedicated appliance tower. These 6-12 inch wide pull-out units can hold multiple small appliances on stacked shelves. They’re especially useful in galley kitchens where wall space is limited.
Drawer dividers made from scrap 1/2-inch plywood keep appliance cords and attachments organized. Cut pieces to fit your drawer dimensions and slot them together with dado joints or simple butt joints secured with wood glue. No need for fancy joinery, functionality matters more than appearance inside a drawer.
If you’re comfortable with basic electrical work (and local codes allow homeowner electrical), add outlets inside base cabinets to create charging stations for rechargeable appliances. Always follow NEC regulations and consider hiring a licensed electrician if you’re uncertain. Most jurisdictions require permits for adding new circuits.
Organizing Small Appliances in Compact Kitchens
Small kitchens demand ruthless prioritization. Many homeowners exploring kitchen storage solutions find that eliminating redundant appliances creates more space than any storage system.
Audit for redundancy: Do you need both a toaster and a toaster oven? A stand mixer and hand mixer? Keep the more versatile tool and donate the other. Consolidating attachment-based appliances to one brand (like choosing all KitchenAid stand mixer attachments instead of separate gadgets) also reduces clutter.
Over-the-door organizers on pantry doors can hold lighter appliances and accessories. Look for heavy-duty fabric or wire models, not cheap plastic that sags under weight. These work best for items under 5 pounds, hand mixers, immersion blenders, and attachments.
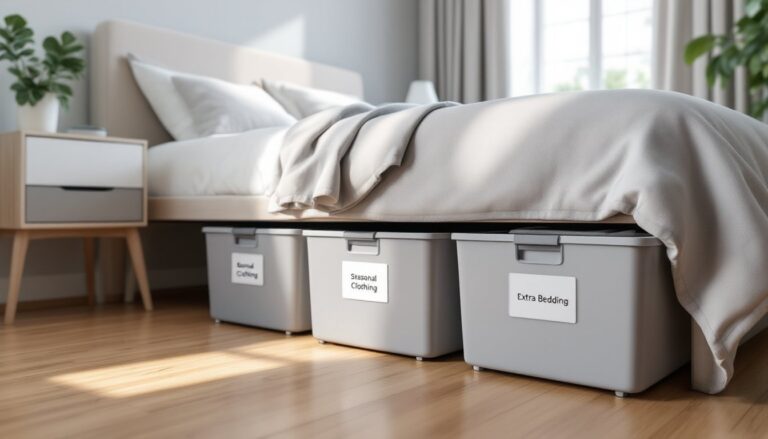
Store appliances in their original boxes in basement or garage space if you use them less than monthly. Label boxes clearly and stack by frequency of use. This isn’t a permanent solution for items you need regularly, but it’s practical for seasonal gadgets like ice cream makers or holiday gear.
For creative storage ideas beyond the kitchen, consider converting a nearby coat closet or under-stair space into appliance storage. Add shelving and relocate infrequently used items there to free up kitchen space for daily tools.
Multi-functional furniture helps too. A kitchen island with built-in shelving or cabinets provides extra storage while adding prep space. If building or buying an island, include at least one deep drawer or cabinet section sized specifically for your largest appliances.
Keep items used together stored together. Coffee maker, grinder, filters, and mugs should all live in the same zone. This approach, borrowed from professional warehouse storage principles, reduces wasted motion and makes morning routines faster.