
Surveillance technology has evolved, but so have concerns about who controls your footage. Cloud-based security cameras send your data to remote servers, convenient, sure, but it also means monthly fees, potential privacy vulnerabilities, and reliance on internet uptime. Local storage security cameras keep recordings on-site, giving homeowners full control over their footage without subscription costs or third-party access. Whether you’re protecting a workshop full of tools or monitoring a front porch, understanding local storage options helps you make an informed choice that balances security, privacy, and budget.
Table of Contents
ToggleKey Takeaways
- Local storage security cameras eliminate recurring subscription fees and privacy concerns by keeping footage on-site under your complete control, making them ideal for homeowners prioritizing data sovereignty and cost savings.
- SD card storage works well for single-camera setups and small areas, while Network Video Recorders (NVRs) provide centralized recording for whole-home systems with extended retention and multi-camera support.
- Choosing H.265 compression, adjustable motion detection, and proper camera placement at 8–10 feet height maximizes both storage efficiency and footage quality for identifying faces and security details.
- Local storage systems remain operational during internet outages, unlike cloud-based alternatives, making them more reliable for continuous surveillance in rural or unstable connectivity areas.
- Proper installation of local storage includes running Ethernet cables early for NVR systems, using PoE switches to simplify wiring, and securing devices in locked spaces to maintain the physical control that local storage provides.
- Before installing cameras viewing public sidewalks or neighboring properties, verify local ordinances regarding video surveillance, data retention requirements, and signage to avoid legal complications.
What Is Local Storage and Why Does It Matter for Security Cameras?
Local storage means video footage is saved directly onto physical media at your property, either inside the camera itself or on a dedicated recording device. No data travels to a manufacturer’s server or cloud service unless you explicitly enable it.
This setup matters for three big reasons: privacy, cost, and reliability. Your footage stays in your hands, which is critical if you’re recording areas like a home office, garage workspace, or entry points. You won’t pay recurring monthly fees for cloud storage plans that can run $5–$15 per camera. And if your internet goes down, local storage keeps recording, cloud-based systems stop dead without connectivity.
Local storage also complies with homeowner preferences around data sovereignty. If you’re uncomfortable with a corporation holding weeks of video from your driveway or backyard, on-site storage is the straightforward answer. It’s worth noting that some jurisdictions have specific rules about video surveillance and data retention, so check local ordinances if you’re recording areas visible to neighbors or public sidewalks.
Key Benefits of Choosing Local Storage Over Cloud-Based Systems
No subscription costs. Most cloud cameras require ongoing fees. A four-camera system at $10/month per camera costs $480 yearly. Local storage has a one-time hardware expense, whether that’s a microSD card or an NVR, and you’re done.
Complete privacy control. Your footage doesn’t pass through third-party servers. If you’re recording a workshop, home gym, or any space where you want zero external access, local is the only true guarantee. Some manufacturers have faced breaches or handed footage to authorities without warrants: local storage sidesteps that risk entirely.
No internet dependency. Cameras with onboard SD cards or wired NVR connections keep recording during internet outages or when Wi-Fi is unstable. This is especially valuable in rural areas or older homes where wireless signal strength varies.
Flexible retention periods. Cloud plans often cap storage at 7–30 days. With local storage, you control how long footage is kept. A 1TB hard drive in an NVR can hold weeks or even months of footage depending on resolution and frame rate, and you can archive specific clips to external drives if needed.
One-time expense, long-term value. After the initial purchase, there’s no recurring cost. For homeowners planning to stay in a property long-term, the math heavily favors local systems.
Types of Local Storage Options for Security Cameras
SD Card Storage
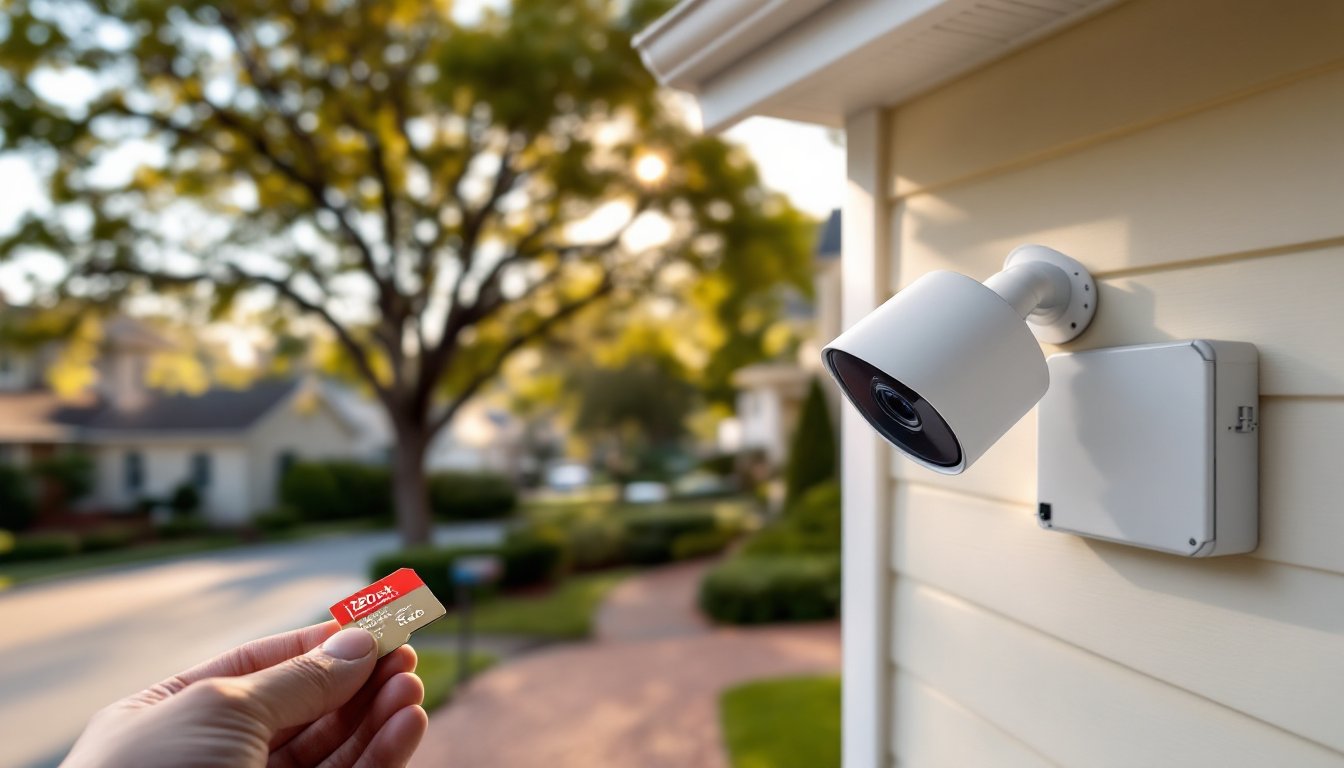
Many standalone cameras include a microSD card slot that accepts cards ranging from 32GB to 512GB. The camera writes footage in a loop, when the card fills up, it overwrites the oldest files automatically.
Pros: Simple, no extra hardware, and budget-friendly. A 128GB card holds roughly 3–7 days of continuous 1080p footage depending on compression (H.264 vs. H.265). Motion-activated recording extends that significantly.
Cons: Limited capacity compared to NVR systems, and if someone steals the camera, they take the footage with it. Cards can also fail over time, cheap models may corrupt after months of constant write cycles. Use endurance-rated microSD cards designed for dashcams or surveillance: these handle continuous recording better than standard cards.
Best for: Single-camera setups, garages, sheds, or secondary monitoring points where you don’t need weeks of retention.
Network Video Recorders (NVR) and Digital Video Recorders (DVR)
An NVR connects to IP cameras over your home network (wired Ethernet or Wi-Fi) and records footage to an internal hard drive, typically 1TB to 8TB. A DVR does the same but uses analog coaxial cameras, which are less common in modern DIY installs.
Pros: Centralized storage for multiple cameras (4, 8, or 16 channels), much larger capacity, and footage stays secure even if a camera is damaged or stolen. Many NVRs support RAID configurations for redundancy. You can access footage via a monitor connected directly to the NVR or through a smartphone app.
Cons: Higher upfront cost ($150–$500+ depending on channel count and drive size), and installation is more involved, you’ll need to run Ethernet cables (Cat5e or Cat6) from each camera to the NVR or use a PoE (Power over Ethernet) switch. Some technical comfort is required for network setup.
Best for: Whole-home systems, monitoring multiple entry points, or properties where you want extended footage retention and centralized playback. Modern smart home technology integrations often pair well with NVR setups for unified control.
Essential Features to Look for in a Local Storage Security Camera
Resolution and compression codec. 1080p is the baseline: 2K and 4K offer more detail for identifying faces or license plates but consume more storage. H.265 compression (also called HEVC) cuts file sizes nearly in half compared to H.264 without sacrificing quality, critical if you’re working with limited SD card or NVR capacity.
Night vision range. Infrared LEDs are standard, but range varies from 15 feet to 100+ feet. If you’re covering a long driveway or large yard, verify the camera’s actual IR range, not just that it “has night vision.”
Motion detection and alerts. Look for adjustable sensitivity and customizable detection zones so you’re not recording every passing car or tree branch. Some cameras offer person/vehicle detection using onboard AI, this reduces false alerts and saves storage by only recording relevant events.
Weather resistance (if outdoor). Check the IP rating. IP65 handles rain and dust: IP66 or IP67 is better for areas with heavy weather. Cameras installed under eaves can get by with IP65, but exposed mounts need higher ratings.
Power source. Wired cameras (PoE or standard plug-in) are reliable but require running cables. Battery-powered models are easier to install but need recharging every few months. Solar panel add-ons can extend battery life indefinitely in sunny climates.
Two-way audio. Useful for communicating with delivery drivers or deterring prowlers. Not essential, but handy if the camera doubles as a video doorbell replacement.
Backup and export options. Ensure you can easily pull footage off the device, whether via USB export from an NVR, removing the SD card, or downloading clips through an app. Some budget models make this surprisingly difficult.
Installation Tips for DIY Homeowners
Plan camera placement before drilling. Walk the property and identify choke points: front door, driveway, side gates, basement windows. Mount cameras 8–10 feet high to capture faces while staying out of easy reach. Avoid aiming directly at the sun or bright lights, which can wash out footage.
Run Ethernet early (for NVR systems). If you’re installing an NVR setup, pull Cat6 cable through walls, attics, or along soffits before mounting cameras. Use a fish tape or glow rods for interior runs. Exterior runs can use UV-rated conduit or direct-burial cable if trenching across a yard. Label both ends of every cable, you’ll thank yourself later.
Use a PoE injector or switch for simplified wiring. Power over Ethernet delivers both data and power through a single cable, eliminating the need for separate power adapters at each camera. An 8-port PoE switch costs $60–$150 and makes multi-camera installs much cleaner.
Secure SD cards and NVRs. If using SD card cameras, mount them high enough that casual tampering is difficult. For NVRs, place the unit in a locked closet, basement, or attic space. The whole point of local storage is physical control, don’t leave it accessible to intruders.
Test before final mounting. Power up each camera, verify the angle and view coverage, and confirm footage is recording to the SD card or NVR. Check night vision performance after dark. Adjust as needed, then permanently mount with stainless steel screws into solid blocking or masonry anchors, not just siding.
Configure motion zones and recording schedules. Dial in detection sensitivity to avoid constant alerts from passing cars or pets. Some systems allow scheduled recording (e.g., only when you’re away) to save storage space.
Wear safety glasses when drilling overhead and use a sturdy ladder with a stabilizer if working near eaves or rooflines. If running cable through exterior walls, seal penetrations with silicone caulk to prevent water intrusion and pest entry.
Some budget-friendly models like those reviewed in guides covering affordable surveillance options pair microSD support with solid performance, making them accessible entry points for DIYers. For broader comparisons and the latest product releases, resources like CNET track new camera models and feature updates as they hit the market.
Final note: If you’re installing cameras that view public sidewalks or neighbor properties, check local laws. Some areas require signage, restrict audio recording, or limit where cameras can point. A quick call to your city’s code office can save headaches down the road.